Tuesday, November 30, 2010

Christmas Mantel

Christmas means stockings and stockings love a mantel.


This is the first house where we've actually had a mantel to hang stockings from!  In fact, I might go so far as to say we bought this house because of the beautiful fireplace.  So what a perfect place to start with Christmas decorating!


Some of the decor is new and some are hand-me-down family heirlooms.  The "HoHoHo" sign I bought at Hancock Fabrics about four years ago for half price.  It was so cute I couldn't resist it.  Little Bit thinks it would be hilarious to turn it around backwards so it would read "oHoHoH"!


The beautiful wreath I bought at Hobby Lobby three years ago.  I got it for half price but it was still a splurge at $50.  I love it, though and it was worth every penny.  It needed to be big to fill this space (from mantel to ceiling is a good 4 1/2 ft) and the white flocking really pops on the black background.


The metal initial I bought at Dillard's three years ago.  I don't remember what I paid for it but I probably got it on sale (knowing me).  Unfortunately it's been knocked over a couple dozen times and has a dent but I love it anyway.


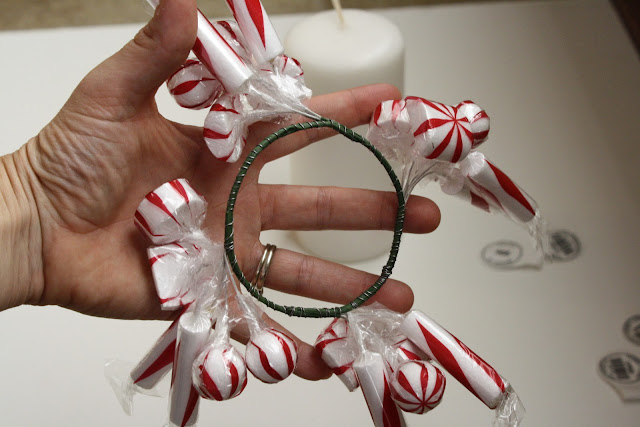
The candlesticks I got from my grandmother many years ago.  I not a big fan of brass and she's not a big fan of "defacing" brass with spray paint so they stayed they way they are.  I have to admit, I kinda like them being brass.  It makes them feel old to me.  And the candle rings I made myself (see the tutorial here).


Down on the hearth is an old sewing basket that my grandma gave me.  I filled it with cheap garland doubled over (to make it a little fuller) and lots of picks of holly.  Both of which I've had for so long I can't even remember where I got them.


Any way, that's my fireplace and mantel.  Just two stockings for my two little men.  One of these days I'm going to get around to making new ones for all four of us!


Framed Hand Prints

Here is an idea that I first used when my youngest was just a baby.

Newlywed (not quite year and a half) and new parents (4 months) we were pretty stinkin' broke!  I wanted a special Valentine's gift for my sweet hubby since he continued to love me despite my tremendous weight gain during my pregnancy (seriously folks, I was huge!)

Any way, this is what I came up with.
(Yes, I know there is no apostrophe in "Spaenys" - I'll get around to changing it one day)

Then, after our second one was born I decided it was time to do another one. 
(Yes, I realize I put an apostrophe in "Spaenys" again.  You try nursing two boys for a combined 2 1/2+ years and see how much brain you have left!  I'll get around to changing this one, too.)

All you need is some coordinating scrapbook paper, a pair of scissors, a frame and a paint pen to improperly write your family name and the holiday.

*Just a little hint, if you are right handed, trace everyones left hand.  It's easier to do your own hand that way.

And here I am close to delivery day!
I told you I was huge!  Can you believe how smokin' hot my husband is?  Yea, ladies, he's all mine!  This was us on Ty England's tour bus (our next-door neighbor was his Road Manager).

I've linked this idea at Tatertots and Jello!
And A Little Lovely!
And Be Different...Act Normal!
And Under The Table and Dreaming!

Sunday, November 28, 2010

King Arthur Flour Giveaway

Okay, guys.  If you know me, you know I love baking.  And King Arthur flour is like the pinnacle of flour brands for me.

Now, if an opportunity arose for me to "gets me some KA", I'm sorry but you guys are going down!  No mercy, folks!  We're talking King Arthur flour here!

But...today you're in luck!  Cheap Chic Home has a King Arthur Flour giveaway!  And if I post and tell you about it, I get an extra chance to win (yea, it's still kinda all about me winning...sorry)!

Here's what you could win:
picture from Cheap Chic Home

One 50 oz. basic muffin mix, one 18 oz. Vermont Maple Walnut muffin mix and two sets of brown tulip muffin papers.

So get yourself on over to Cheap Chic Home and enter for your chance to win!  Don't forget to tell her "Tres French Hens" sent ya!

Saturday, November 27, 2010

Floral Pick Candle Ring

About three years ago I went in search of a candle ring.  Unfortunately, I knew exactly what I wanted.  I say "unfortunately" because every time I know exactly what I want, I can't find it...does this happen to you?

Anyway, not only could I not find what I wanted, candle rings were expensive, to boot!  Have you priced them lately?

Once I realized I was never going to find what I wanted the gears starting turning.  I picked up a candle ring and took a look.  "I could make one of these," I thought.  So I walked over to the aisle with all the Christmas floral picks and started looking.  I found what I needed!

These candle rings are super easy and you will love the results!  The possibilities are endless!

Here's what you will need:
floral picks 
(How many will depend on the type of pick and the size of your candle.
I used 4 here.  Half price at Hobby Lobby!)
30 gauge wire
wire cutters

Now, start curving your picks to the shape of your candle.

Then, begin wiring them together by wrapping the wire around two pieces at a time, like this.  Continue in this fashion until you have wired all your picks on and they will make a circle big enough to fit around your candle.
 Gloves would be a good idea here.  It hurts like the dickens when you poke yourself with this wire...not to mention, you bleed like crazy!  I wouldn't know anything about this, but I've heard it happens.  (Yea, right!)

Here are all four of mine wired together.  Now it's time to connect them to make a ring.  Be sure to measure around the base of your candle at this point to make sure it will fit!

Here are mine all connected.
You could, of course, wrap these with floral tape now that you are finished, but it's not necessary.  No one will see this.

Now all you have to do is "fluff" your picks!

This is the first set I made.

And here are the ones I made today.  Easy peasy, mac & cheesy!

Total cost for 1 candle ring:  $1.98!  Gotta love that!

I'm sharing at Under the Table and Dreaming!

Tuesday, November 23, 2010

Pumpkin Whoopie Pies

My boys are out of school all week this week for Thanksgiving break (I'm lovin' having them home!) so I decided to take this opportunity to make some Pumpkin Whoopie Pies together.  We'll be taking them over to our friend Thomas' house tomorrow for our Kid Thanksgiving celebration!  I found the recipe here.

 When I told the boys we were making Whoopie Pies they cracked up.  I guess "whoopie" sounds a lot like potty talk and you know how funny potty talk is to elementary age boys!  Once they quit laughing they asked "Is that really what their called?"  Yep.

Disclaimer!
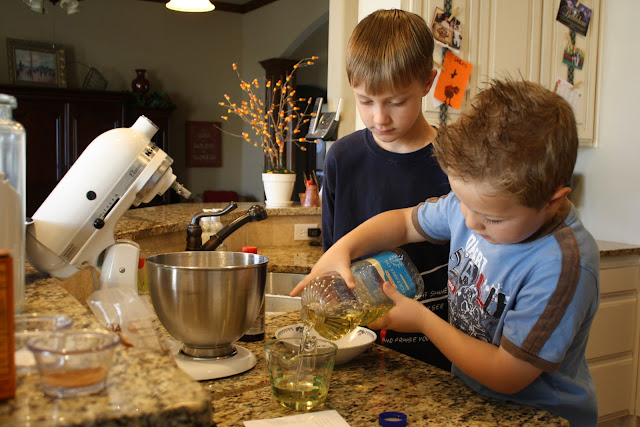
Now, before you start thinking "Wow!  What a great mom to get in the kitchen with her boys and let them have at it!"   Let me tell ya somethin'...it was excruciating!  If you know me, perhaps you already know I am a control freak!  This whole idea of letting my boys bake is tough for me.  But, I stood back and gave verbal instructions and let them do it by themselves.

They actually washed their hands without me having to tell them to!

This is what you'll need:

Pumpkin Cookies
2 eggs
2 cups light brown sugar
1 cup vegetable oil
1 teaspoon vanilla extract
1 (15 oz) can pumpkin
3 cups flour
1 tablespoon pumpkin pie spice (**recipe follows)
1 teaspoon baking powder (**recipe follows)
1 teaspoon baking soda
1 teaspoon salt

Filling/Cream Cheese Frosting
4 ounces cream cheese, softened
1/2 cup butter, softened
2 teaspoons vanilla extract
4 to 5 cups confectioners' sugar

Here's what you do:

Step 1:  Heat the oven to 350F.  Take a deep breath and read first part of recipe to boys; "Beat the eggs, brown sugar, oil and vanilla extract in a mixing bowl until smooth.  Stir in the pumpkin.  In a separate bowl, combine the flour, pumpkin pie spice, baking powder, baking soda and salt.  Add the dry ingredients to the egg mixture a half cup at a time, blending each time until smooth."  Heartbeat a bit elevated but still under control.  Focus on breathing.
 They took turns cracking the eggs.
 No shells!
 Easy does it!
What was I thinking?  This could have ended up all over the place!
This is what we ended up with.

Step 2:  Take another deep breath and remind yourself that they are having fun and so are you.  Read next step of the recipe; "Drop a heaping tablespoon of batter onto an ungreased cookie sheet, using a moist finger or the back of a spoon to slightly flatten each mound.  Bake the cookies for 12 minutes, then transfer them to a wire rack to cool completely."  Okay, starting to freak out now.  Controlled breathing...
 It took everything I had to watch this and not take over!  These are supposed to be round...ish!
 Little Brother doesn't look too impressed.
What a sight!
"Are they almost done?"

Step 3:  I'm feeling a little light headed.  Is this normal?  Am I the only one who's hot right now?  Keep breathing.  Distract kids with something else.  Read next step...to myself; "Meanwhile, make the frosting.  Beat together the cream cheese, butter and vanilla extract in a bowl until light and fluffy.  Mix in the confectioners' sugar a half cup at a time, until the frosting is spreadable."  (The recipe calls for more sugar than I think you need or can even get incorporated.  I say, find a taste and consistency you like and go with that.)
Now, I think I'm doing a good thing here...letting my boys bake.  All by themselves.  And this is what I get:
 "Can I go now?"
Good stuff, Mom!
 Oh sure, now he's interested!

Step 4:  Breathing has returned to normal.  Kids are happy with licking the beater.  Casually read next step to self; "To assemble the pies, turn half off the cookies bottom side up and spread a generous amount of cream cheese frosting on each one.  Top them with the remaining cookies (turned right side up)."  (The recipe says it makes 10 to 14.  We ended up with 20.  The ones they boys made were smaller than the ones I made.  I have to admit that I liked the small ones better.  These cookies are sooooo rich, one small cookie is more than enough.)
My #1 taste tester!

**Okay, I don't know about you but I hate having a bunch of containers of spices floating around in my cabinet...there are enough in there already!  So I decided, why do I keep pumpkin pie spice and baking powder on hand when I have separate containers of the ingredients used to make them?  Now I just make them as I need them.  An added bonus; I've noticed a difference in the texture and loft of my baked goods now that I make my baking powder fresh!

So here are the recipes I use:

To make 1 teaspoon of pumpkin pie spice:
1/2 teaspoon cinnamon
1/4 teaspoon ground ginger
1/8 teaspoon allspice or ground cloves
1/8 teaspoon ground nutmeg

To make 1 teaspoon baking powder:
1/4 teaspoon baking soda
5/8 teaspoon cream of tartar

I guess this recipe is a keeper!

And you know what?  We did have a good time.  In fact, I think we'll do something like this again!

Monday, November 22, 2010

Christmas Card Display

Here is an easy and inexpensive way to display all those Christmas cards you get each year.  I wish I could say I came up with this all by myself but I actually got this idea from a friend.  It's very clever!  You use your kitchen cabinets!

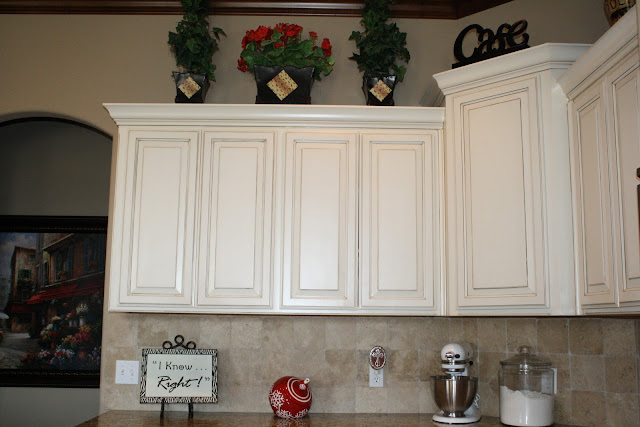
Here are my kitchen cabinets.

Here are the supplies you'll need:
packing tape
wide ribbon
Easy enough, right?

Now, just cut your ribbon long enough to wrap from the top (inside) of your cabinet around the outside and back up the bottom (inside) and tape into place.

And that's all there is to it!

Just use clothespins to attach the Christmas cards as they come in!

If you wanted you could decoupage or paint the clothespins to coordinate.

You can also use this idea for everyday, too.

Now, bring on the Christmas cards!

Friday, November 19, 2010

Giving Thanks for the Little Surprises!

I have horrible sleeping patterns.  I get up at weird hours during the night.  This morning's wake up was at 3:55am.  This works out well for blogging, though.  At least I'm not up watching reruns of The Nanny or knitting another hat.

Well, this morning I had a wonderful surprise waiting for me in the kitchen!

I stumble in to make some of this:

(Sorry for the obnoxious flash!  Remember, it's 4 o'clock in the morning and the sun isn't out yet!)

And what I saw was this!


Aren't these the cutest things ever?!  I made them last night for Little Bits Kindergarten Thanksgiving Feast.  I didn't even take pictures along the way thinking these would turn out "okay" at best.  They're K'ers, they don't care about table decorations!  

But the results blew me away!

So here's a quick rundown of what I did.  It's super simple.

Supplies:
  • small pumpkins
  • Cricut personal cutting machine
  • a Paper Dolls Dress Up Cricut cartridge (thanks for letting me borrow this Kendra G!)
  • brown craft paper
  • markers
  • Mod Podge
  • foam brush
First I cut out the shapes I wanted using my Cricut and Paper Dolls cartridge.  They came out with some accent lines cut into the paper that were hard to see.  This is where the markers came into play.  I just used them to highlight where the cuts were (the musket and the hat were colored in completely).

Next I put down a layer of Mod Podge on the pumpkins using my foam brush.  Then I put my pictures on top and covered with another layer of Mod Podge.  I just used my fingers to smooth it down as much as possible.  Flat paper + round pumpkin = lots of bumps!  Mostly smooth is good enough (it feels very secure this morning).

Then I went to sleep and woke up to this wonderful surprise!


I also made some candy corn trees.  Just bigger versions of what Mitzi A did on her kids Thanksgiving table (see my post Home for the Holidays Part 1).  In fact, she gave me two of her little trees and two leftover bags of candy corn!  The pots I had out in the shed and the limbs I cut from the trees behind our church after work yesterday.  Total cost:  $0!


And I couldn't resist putting this in.  It's what my Little Bit is thankful for this year.

Ethan, Blair (two friends from school), Dad, Mom and Miss (his teacher).

Pardon me while I get a tissue! (sniff, sniff) 

I can hardly wait to give thanks with Little Bits class this morning!  I have so much to be thankful for!

"Thanks be to God for his indescribable gift!"
2 Corinthians 9:15

Have you given thanks to God today?

If you liked what you saw (and I really hope you did!), would you consider following me or leaving me a comment?  That would make me very happy!

Thursday, November 18, 2010

The Chicken & The Egg

Part of the reason I named my blog Tres French Hens is because of my hens.  I love those ladies!  They are what you call "backyard chickens."


We live on a quiet cul-de-sac in the suburbs.  Nearly two years ago I received a coupon in the mail from a feed store that was for one free baby chic with every purchase!  So I grabbed my husband, my kids, our exchange student from Germany (she's been with us over 6 months at this point and already knows I'm crazy) and my coupon and off we went to the feed store.  Our exchange student says, "You can't have just one chicken!  She'll get lonely!"  Sales 101, ladies.  You get them to say yes to one, and the rest are easy.

Well, they were all out of baby chics. :(

Not being deterred, I talked my family into going to Tractor Supply before heading home.  We'll, they had lots of chickens...and ducks...and rabbits.  The kids become distracted by all the chirping chicks, my husband goes off to look at boots or something and I start getting an education on raising poultry from Wayne (the clerk working that day)!


I asked this poor man everything I could think of.  Where do they sleep?  What do they eat?  How many eggs will they lay?  Where do they lay their eggs?  What kind of shelter do they need?  How much space do they require?  And any other thing I thought my husband might ask me.


Turns out you can use an old dog house and dog kennel for a chicken coop.  What a coincidence!  have an old doghouse and dog kennel not being used right now!  And they need a heat lamp.  Wow!  I already have one of those,too!  Weird, huh?

(This was their "starter home" - dog house and old dog kennel)

Anyway, I'm pretty sure I have my sweet husband convinced to let me get one chicken...but Tractor Supply only sells them in lots of six.  Okay, this may take a little extra convincing but it's not impossible!

Well, it's time to go.  No chickens.  On the ride home I start info dumping on my husband all the things I learned from Wayne.  Stuff like how they make great fertilizer.  They will keep bugs out of the garden.  We can get fresh eggs. We already have the stuff we need to house them.  There is no down side to owning chickens, really!


We make it home and I'm still rambling about chickens.  Finally when I stop my husband says to me:

Hubby:  "Do you really want six chickens?"

Me:  "Oh, baby, I really do!"  (doe eyes; sad face)

Hubby:  Big sigh.  "Fine.  Go get some before I change my mind."

Me:  Kiss on the cheek for hubby.  "Thanks, baby!  I love you!  How many can I have?"  Purse in hand, running out the door!


Our exchange student and I are off to buy six pullets (that's chicken talk for lady chickens!).  And thus began my legacy among my friends as the Crazy Chicken Lady !

I love my ladies.  Let me introduce you to them!

Left to right:  Betty, Anna, Ruth, Louise and Madge
Not pictured:   Thelma (she made a trip to the dog's side of the yard and never returned)  :(

Here are their new digs.  Quite a step up from the dog house, don't you think?

Well, at one egg per chicken per day the eggs start to add up fast.  With this many eggs I had to start finding a use for them.  So I took up baking and quiche.


This is a recipe I found in one of my Paula Deen cookbooks called Sausage and Mushroom Quiche.  I absolutely love it.  So much so I eat it every morning for breakfast and sometimes lunch, too!


Because this is Paula's recipe I unfortunately cannot share it with you over the internet or I could get thrown in jail.  This would not be good at all seeing as how I have two small boys and a husband to raise.  

I highly recommend this book and can assure you that if you decide to purchase it (or come over and borrow it from me!) you won't be disappointed .  The book is laid out by "parties" so an entire menu is provided in each section.  

This particular recipe is from the "Christening Brunch" and includes Praline French Toast Casserole, Baked Garlic Cheese Grits, Broiled Parmesan Tomatoes, Mushroom and Sausage Quiche, Spinach and Bacon Quiche, Sausage Balls, Watermelon Fruit Basket, Ginger-Poppy Seed Fruit Dressing and Animal Shaped Sugar Cookies.  I've done every recipe except the dressing and cookies and all were delicious.

You can also find some wonderful Paula Deen recipes on her website or on the Food Network website.  Another very favorite website for delicious recipes is SouthernLiving.com

So if you live in an area that allows chickens, won't you consider some?  They are inexpensive to keep and a joy to watch.  My boys absolutely love them!  Plus they eat all our fruit/veggie and bread scraps!


If you have any questions about owning backyard chickens, please ask!