Showing posts with label tutorial. Show all posts

Wednesday, December 14, 2011

Insulating Your Garage Doors

Recently I decided it was high time to make my work space more workable (see post here).  Since winter is here and it's way too cold to work out in the garage/work shop, I decided insulating the garage doors was the first step.

So here are the steps to getting it done.

There are a couple of options when it comes to the type of insulation you can use.  We decided on the foam panels.  It gives a nice finished look once installed.  We weren't able to find these at our local home improvement stores but we did find them at a garage door specialty store and were able to buy them there.  They can also be ordered online.

Before you go to buy your insulation panels, you will need to know the height of your garage door panels.  They generally come in about four different heights (18", 21", 24", and 27").  This will allow you to determine the size panels you need.

Next, you need to know how many insulation panels you will need.  Most garage door widths are pretty standard.  We told our guy we needed enough to do (1) two-car garage door and (1) single car garage door.

Here are what the panels look like.


Now it's time to measure how wide your panels need to be.


On our garage door, the two end sections were different widths than the two middle sections.

Using your tape measure, measure off this width onto the insulation panels...


and use your straight edge and box knife to cut them.


It doesn't cut all the way through, so you can gently "snap back" the panel for a pretty clean break.


Now it's time to install.  Slip the bottom in the "notch" on the garage door panel and gently bend the insulation to pop it into place.


For a finished look, you can install these end pieces.  They install in a similar manner (these were pre-cut to the height of the panels)


And that's really all there is to it!  My husband did both doors in about 2 hours time and the cost was a little over $225.

We have noticed a definite difference in the temperature of the garage - about 10 degrees F warmer than the exterior.  And it's much quieter now (the stereo sounds better, too!).

It's not the most glamourous upgrade but it makes working in the garage in the winter much more bearable!

Thursday, November 10, 2011

Cheese Cloche Redo

Okay, I really wanted to title this "Nacho Cheese Cloche".  Get it?  Not yo cheese cloche? Anyway, it was funny in my head.

I found this great blog, Maiden D'Shade.  She shared how she turned a cheese cloche and a candlestick into a wonderful pedestal cloche.  Well, it just so happened that I had a chunky candlestick I had picked up at Goodwill and a cheese cloche I snagged at a garage sale a few weeks before.
So I busted out my saw (note the line around the fat part of the candlestick) and cut down the candlestick to the fattest part.  The proportion seemed to make more sense when the cloche was setting on it.  Next, I sanded it down and glued the two together with my trusty E6000.  This stuff holds everything together!

Once that was done, I spray painted it gloss black, my go to color.  By the way, if you haven't tried Ace Hardware Premium Enamel spray paint, you haven't lived!  This stuff is my new favorite spray paint!  Not to mention I love shopping at my local store.  The are so helpful and friendly.  Ha!  I just had their commercial pop into my head..."Ace is the place with the helpful hardware man."  It's so true!

Anyway, a coat of black paint and this is what my cheese cloche and candlestick turned into!  A cheese cloche on a candlestick!
I still think Nacho Cheese Cloche is funny.

Thanks Kim from Maiden D'Shade!

Monday, January 17, 2011

Felt Flower Tutorial

I love big flowers for embellishing most anything and everything!  With winter here, I wanted felt flowers instead of the silk flowers I've been using.  I searched the internet and kind of combined some ideas from some of the flowers I saw.  This is what I came up with (some pictures are of my red flower and some are of the purple.)


Here's what you will need.
1 sheet of felt
1 large button
complementary colored yarn or embroidery floss
hot glue gun
hair clip
lapel pin

First I cut five petals about 3 inches in length.  (This is done completely free hand.  Don't sweat the shape too much.  It will look good, I promise.)  Then do five petals around 2 1/2 inches and five around 2 inches.  The red flower I made with a bit of a pointy petal.  This gives a poinsettia look.


To give it some "oomph" I decided to sew a seam along the back.  It gives a little more depth.  Just fold them in half and line them up on the sewing machine and do one after the other then cut them apart.

Next, cut a circle from the felt to use as base for the flower.  Start gluing the 3 inch petals around the outside.  Then glue the 2 1/2 inch petals and finally the 2 inch petals.

Finish off with a button laced with yarn or embroidery floss hot glued to the middle.

Flip over to the back and use a scrap piece of felt to attach the clip and pin with hot glue.


Your flower is finished!  I hope you get as much mileage out of your flowers as I already have from mine!


One way I use mine is on my favorite knit beanie!


And as a lapel pin to dress up my jean jacket!

I'm linking this idea to these wonderful blogs!
C.R.A.F.T.
Finding Fabulous

Monday, December 13, 2010

The Making of a Christmas Manger

For three years now, I've asked my husband to make me a manger.  I want a big one to put outside during Christmas.  I know he can do it.  Four years ago he made me a giant red sleigh.  I loved it!  But it was so big that you had to disassemble it to put it away every year and the screw holes had started to strip out.  This year he said "no red sleigh."  So where is my manger?

Well, I don't try not to nag and I know there are other projects he would rather be working on.  So this morning after I dropped the boys off at school I decided to make my own manger.  Now, I'm good at a lot of things...but apparently wood working is not one of them!

I headed out to the shed and found some scrap pieces I thought would work.  They aren't quite the size I was wanting but I figured smaller would be easier to work with (since I'm doing this by myself).  I needed slats for the sides and some pieces for the legs.
I was in the driveway cutting wood when the "bug guy" showed up to spray the house.  He was probably afraid to leave...afraid I was going to cut my leg off and no one would be here to help.

Now, how does someone build a manger?  This I do not know.  But I figure I'm a smart gal, I can figure it out!  Well, I guess I can.  Eventually.

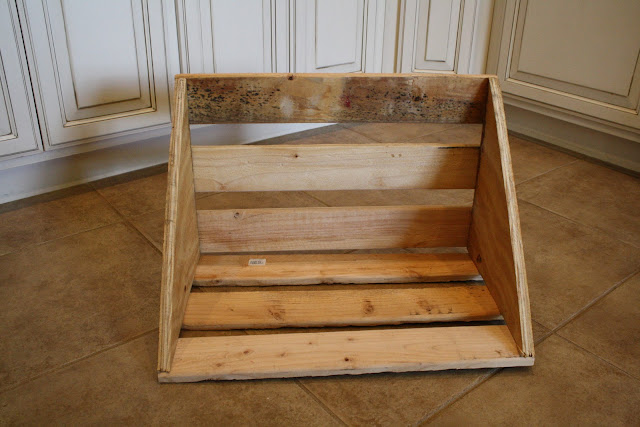
This is what I came up with initially.
Great looking except for one thing...what do I do for legs?  Hmm.  Hadn't thought of that.  Disassemble.  Back to square one.

Now I'm thinking I need to work the legs into the top some how.  Make it all one piece.  So this is what I decided to do.
I took an old section of fence and ripped the pickets off.  Four pickets, four legs.  Then I cut the tops off.  Next I laid one on its side and lined three slats up from the top down.  I just eyeballed the space in between but would recommend measuring.  The next one my husband makes, I will measure.  I think it will help ensure that it's mostly level that way.  Then I attached another leg to the other end of the slats.  I repeated this process (be sure to pre-drill your nail holes).
Now I have two sections that I can overlap and make into an "X" shape.  Looks like a manger and it has legs!  I positioned them at a 45 degree angle and inserted two screws where they overlap (on each side).  The two screws lock it into position (just one and it would open and close too easily).  Screws allow me to disassemble the manger and store it flat for next year.  Plus all the nails I could scrounge up were too long.  Remember, I'm working with what I've already got!
It's not at all fancy but I figure it is authentic.  What is a manger, after all, but a place to hold hay?  This one will do just that.  I'll borrow some fresh straw from the chickens...baby Jesus needs a soft place to lay!

The dimensions ended up being about 2 ft x 2 ft.  Now my husband has an idea of how to build the big one I'm wanting for the front yard.  This one will just go in the flower bed for now and can be moved indoors when Manger #2 comes along!

He came home about the time I was finishing up and literally cringed at the sight of me using his power tools.  That'll teach him to put me off!

Sharing this idea at these other wonderful blogs:
Please stop by and visit them to find other amazing ideas!

Thursday, December 9, 2010

Ceramic Tile Dry Erase Board

Scripture memorization is a big thing in our house.  Both of my boys memorize bible verses for church on Wednesday nights and for school each week.  I needed a way to keep the assigned scripture for the week handy without having a piece of paper floating around on my kitchen counter (my kitchen now has twice as much counter space as my previous kitchen and I swear we could still fill up more!).

It needed to be easily accessible, it had to change weekly and it had to be nice looking.  Well, this is what I came up with and I really have enjoyed it.  And it was inexpensive, super simple to make and it took only minutes from start to finish.


I bought a 6x8 white ceramic tile from the hardware store (less than a dollar).  I decided I wanted to tie a ribbon at the top and chose to drill a couple holes with a masonry bit.  I just eyeballed the spacing.  You can tell I spent a lot of time making sure I got them level (my writing is as wonky as my "eyeballing"!).  It isn't noticeable once the ribbon is in.


Of course, you could skip this step and just hot glue the ribbon on but I wanted to impress my husband by asking (imagine serious tone, thoughtfully grasping chin and furrowed brow) "Do you think I should use a masonry bit to drill into this tile?"   I think he was pretty impressed!


Then I laced through some ribbon (this is just what I had on hand that would match the kitchen) and tied a bow.  I like that the ribbon softens it up a bit.  Then I cut a fleur de lis on some black vinyl with my Cricut (I love that darn machine!) and put it in the lower corner.


Next, I needed a way to display it.  I thought about hanging it but decided to keep it on the counter instead.  This way I can lay the tile flat to write on it.  I had some of these picture holder thingies (for the life of me I can't think of what these are called!) and decided this would make a great stand (and it keeps the marker handy, too!).


Now if I were going to give this as a gift, I would take the time to cover the back of the tile with some coordinating felt.  But it's just us and I'm the only one who writes on it (maybe it's a little too "femmed up" with the leopard bow and fleur de lis for the guys!).  We keep it in the kitchen on the counter and the boys and I go over their verses while they eat breakfast and I gulp sip my coffee in the morning.  It's a great way to start the day!


We use ours for scripture, but you could also use it for honey-dos, love notes to your hubby, jot down notes by the phone...lots of things,really!

Friday, December 3, 2010

Christmas Crafts To Do With Your Kids

Christmas break is coming for the kiddos and you know what that means!  "Mom, I'm bored!"

Well, fret no more, mom friends!  Here are some crafts that the kids will enjoy making and you will cherish for years to come.  These would be appropriate for preschoolers on up.  The supplies are easy to find, too.

This first one requires construction (or colored) paper, google eyes and a red pompom.
(Sorry this picture isn't so great.  I moved it all over the house but the glass reflects everything!  This is as good as it gets!)
Trace your child's foot on brown paper and each hand on black paper.  Cut out and assemble into the shape of a reindeer.  Next attach google eyes and a red pompom for the nose.  Your done!  I pasted this one on another piece of colored paper and mounted it in a shadow box frame.  I hang it every Christmas!

Here's a cute Christmas ornament!  You'll need a candy cane, a star, some moss, cotton, a wooden bead and a paper clip for hanging.

Turn the candy cane upside down and glue on some moss then some cotton.  Draw a face on the wooden bead and glue to the cotton.  Finally glue the star on top (you can embellish with glitter if you have some) and attach an opened paper clip for hanging.

Finally, here is a sweet nativity.  You'll need three small flower pots, three wooden beads, a small amount of moss (or shredded paper), small scraps of fabric and craft paint.

Paint all three flower pots (we used a navy, a brick red and a gold color).  Draw faces on the three beads.  Next hot glue Mary and Joseph's heads to the bottom of two of the pots and glue small scraps of fabric to their heads.  Take the third flower pot and put some moss in the bottom then glue the head to the inside of the pot.  This is your baby Jesus.

We made a set of these for all the grandparents and great-grandparents in our family.  They loved them!

I hope these ideas inspire you and help you keep your sanity during the extended break!

I shared these ideas at Tatertots and Jello!
And Funky Junk Interiors!
And A Little Lovely!
And Be Different...Act Normal!
And Under The Table and Dreaming!
And Blissful and Domestic

Tuesday, November 30, 2010

Framed Hand Prints

Here is an idea that I first used when my youngest was just a baby.

Newlywed (not quite year and a half) and new parents (4 months) we were pretty stinkin' broke!  I wanted a special Valentine's gift for my sweet hubby since he continued to love me despite my tremendous weight gain during my pregnancy (seriously folks, I was huge!)

Any way, this is what I came up with.
(Yes, I know there is no apostrophe in "Spaenys" - I'll get around to changing it one day)

Then, after our second one was born I decided it was time to do another one. 
(Yes, I realize I put an apostrophe in "Spaenys" again.  You try nursing two boys for a combined 2 1/2+ years and see how much brain you have left!  I'll get around to changing this one, too.)

All you need is some coordinating scrapbook paper, a pair of scissors, a frame and a paint pen to improperly write your family name and the holiday.

*Just a little hint, if you are right handed, trace everyones left hand.  It's easier to do your own hand that way.

And here I am close to delivery day!
I told you I was huge!  Can you believe how smokin' hot my husband is?  Yea, ladies, he's all mine!  This was us on Ty England's tour bus (our next-door neighbor was his Road Manager).

I've linked this idea at Tatertots and Jello!
And A Little Lovely!
And Be Different...Act Normal!
And Under The Table and Dreaming!

Saturday, November 27, 2010

Floral Pick Candle Ring

About three years ago I went in search of a candle ring.  Unfortunately, I knew exactly what I wanted.  I say "unfortunately" because every time I know exactly what I want, I can't find it...does this happen to you?

Anyway, not only could I not find what I wanted, candle rings were expensive, to boot!  Have you priced them lately?

Once I realized I was never going to find what I wanted the gears starting turning.  I picked up a candle ring and took a look.  "I could make one of these," I thought.  So I walked over to the aisle with all the Christmas floral picks and started looking.  I found what I needed!

These candle rings are super easy and you will love the results!  The possibilities are endless!

Here's what you will need:
floral picks 
(How many will depend on the type of pick and the size of your candle.
I used 4 here.  Half price at Hobby Lobby!)
30 gauge wire
wire cutters

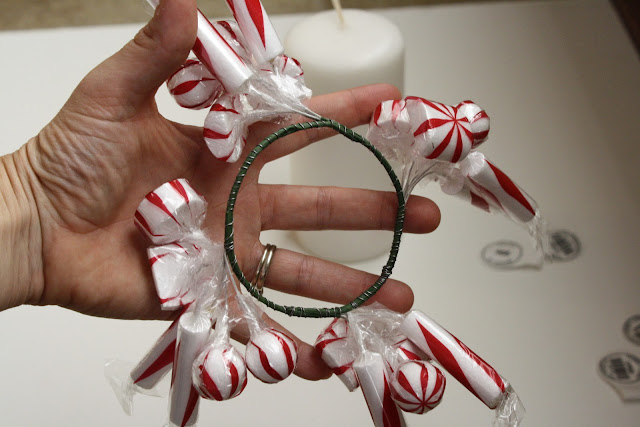
Now, start curving your picks to the shape of your candle.

Then, begin wiring them together by wrapping the wire around two pieces at a time, like this.  Continue in this fashion until you have wired all your picks on and they will make a circle big enough to fit around your candle.
 Gloves would be a good idea here.  It hurts like the dickens when you poke yourself with this wire...not to mention, you bleed like crazy!  I wouldn't know anything about this, but I've heard it happens.  (Yea, right!)

Here are all four of mine wired together.  Now it's time to connect them to make a ring.  Be sure to measure around the base of your candle at this point to make sure it will fit!

Here are mine all connected.
You could, of course, wrap these with floral tape now that you are finished, but it's not necessary.  No one will see this.

Now all you have to do is "fluff" your picks!

This is the first set I made.

And here are the ones I made today.  Easy peasy, mac & cheesy!

Total cost for 1 candle ring:  $1.98!  Gotta love that!

I'm sharing at Under the Table and Dreaming!

Monday, November 22, 2010

Christmas Card Display

Here is an easy and inexpensive way to display all those Christmas cards you get each year.  I wish I could say I came up with this all by myself but I actually got this idea from a friend.  It's very clever!  You use your kitchen cabinets!

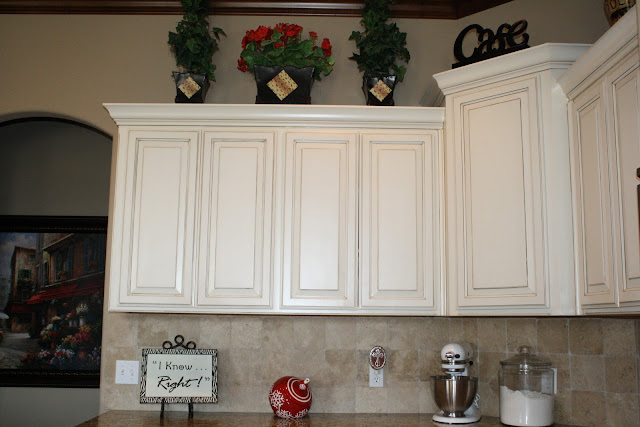
Here are my kitchen cabinets.

Here are the supplies you'll need:
packing tape
wide ribbon
Easy enough, right?

Now, just cut your ribbon long enough to wrap from the top (inside) of your cabinet around the outside and back up the bottom (inside) and tape into place.

And that's all there is to it!

Just use clothespins to attach the Christmas cards as they come in!

If you wanted you could decoupage or paint the clothespins to coordinate.

You can also use this idea for everyday, too.

Now, bring on the Christmas cards!

Friday, November 19, 2010

Giving Thanks for the Little Surprises!

I have horrible sleeping patterns.  I get up at weird hours during the night.  This morning's wake up was at 3:55am.  This works out well for blogging, though.  At least I'm not up watching reruns of The Nanny or knitting another hat.

Well, this morning I had a wonderful surprise waiting for me in the kitchen!

I stumble in to make some of this:

(Sorry for the obnoxious flash!  Remember, it's 4 o'clock in the morning and the sun isn't out yet!)

And what I saw was this!


Aren't these the cutest things ever?!  I made them last night for Little Bits Kindergarten Thanksgiving Feast.  I didn't even take pictures along the way thinking these would turn out "okay" at best.  They're K'ers, they don't care about table decorations!  

But the results blew me away!

So here's a quick rundown of what I did.  It's super simple.

Supplies:
  • small pumpkins
  • Cricut personal cutting machine
  • a Paper Dolls Dress Up Cricut cartridge (thanks for letting me borrow this Kendra G!)
  • brown craft paper
  • markers
  • Mod Podge
  • foam brush
First I cut out the shapes I wanted using my Cricut and Paper Dolls cartridge.  They came out with some accent lines cut into the paper that were hard to see.  This is where the markers came into play.  I just used them to highlight where the cuts were (the musket and the hat were colored in completely).

Next I put down a layer of Mod Podge on the pumpkins using my foam brush.  Then I put my pictures on top and covered with another layer of Mod Podge.  I just used my fingers to smooth it down as much as possible.  Flat paper + round pumpkin = lots of bumps!  Mostly smooth is good enough (it feels very secure this morning).

Then I went to sleep and woke up to this wonderful surprise!


I also made some candy corn trees.  Just bigger versions of what Mitzi A did on her kids Thanksgiving table (see my post Home for the Holidays Part 1).  In fact, she gave me two of her little trees and two leftover bags of candy corn!  The pots I had out in the shed and the limbs I cut from the trees behind our church after work yesterday.  Total cost:  $0!


And I couldn't resist putting this in.  It's what my Little Bit is thankful for this year.

Ethan, Blair (two friends from school), Dad, Mom and Miss (his teacher).

Pardon me while I get a tissue! (sniff, sniff) 

I can hardly wait to give thanks with Little Bits class this morning!  I have so much to be thankful for!

"Thanks be to God for his indescribable gift!"
2 Corinthians 9:15

Have you given thanks to God today?

If you liked what you saw (and I really hope you did!), would you consider following me or leaving me a comment?  That would make me very happy!